
(03) 9758 0555
WATERPROOFING IN 8 SIMPLE STEPS

PREPARE & PRIME
Ensure all fixings are below the floor height. Clean substrate with a brush to remove dirt, broom/vacuum floors. If required, wash with a PH neutral detergent. Allow substrate to dry completely, then apply PDQ Purple Primer.
CAULK & SEAL
Seal all wall/floor junctions with SMX-50 sealant and apply SoudaTape to corners. Tape should be applied over the wet sealant.

BOND BREAKER TAPE
Apply bond breaker tape to all floor joints to allow the subfloor to move under the PDQ poly in extreme heat conditions or if there are any stress fractures present in the substrate.

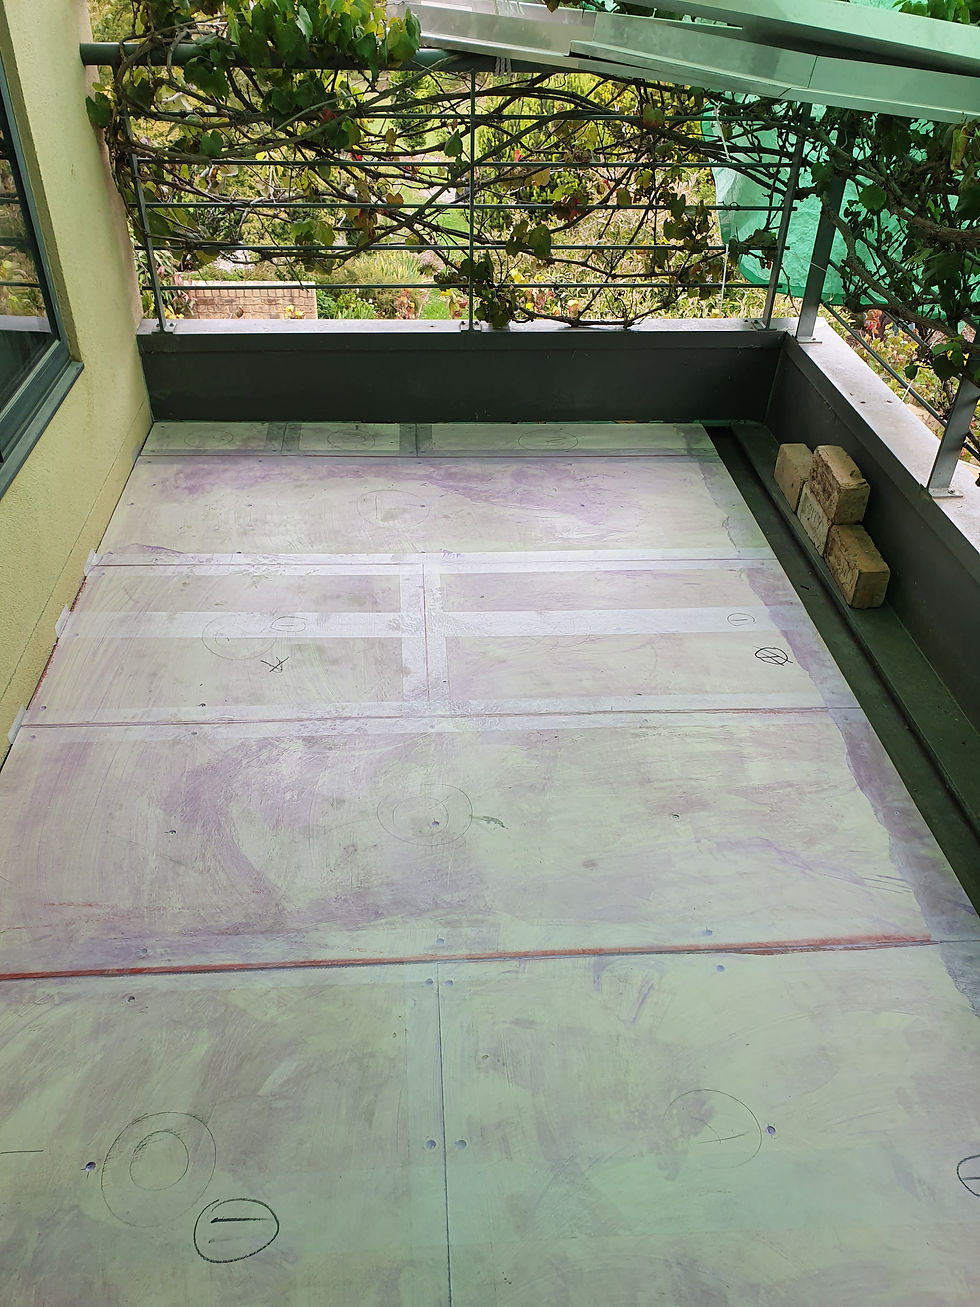
MARK OUT
Lay the PDQ Poly at a right angle to the length floor or to the drainage. Leave a 5mm gap between sheets (chalk-lines at 1305mm).

BASE JOINT TAPE
Roll out and cut the base joint tape to length (including
wall returns). Remove the backing paper and place tape centred to the joins. Press down with your hand.

PRE-CUT
Roll out PDQ Poly sheet face-up (leave backing paper attached). Cut sheets to length (including wall returns), number each section and corresponding section of substrate/floor.

APPLY PDQ POLY SHEETS
Roll up and pre-peel 20mm of backing paper. Start
laying the sheet, gradually remove the backing paper and press the sheet onto the substrate. Removing air
bubbles as you go (if there are excessive air bubbles
lift sheet up and reposition).

TOP MESH TAPE & SEAL
Apply Top Mesh Tape centred to the joins and apply to the entire length of the joins. Press down with your hand.
Seal the Top Mesh Tape with SMX-50 sealant and smooth over with a trowel.
Purple Primer can be applied to the wet sealant for tile adhesion.
APPLICATION FEATURES OF PDQ POLY
PDQ POLY™ saves time, costs and provides a more efficient solution for waterproofing internal and external areas, other features include:
-
Repositionable for up to 4 hours before glue starts to migrate
-
Applied with a specialised Junction Tape to insure expansion and contraction
-
Can be tiled over and walked on immediately (allow 45 minutes for caulking to set, but this is usually ready by the time you've finished laying the PDQ Poly sheet membrane)
-
Malleable with heat to form down inside Puddle Flanges or other tight, odd shapes
SUBSTRATES
PDQ POLY™ is designed and manufactured to reliably adhere to many different substrates, such as:
-
Tongue & Groove Timber Flooring
-
Chipboard/Particle Board
-
Plywood
-
Concrete
-
Sand & Cement Screeds
-
Self-levelling Compounds
-
Terrazzo Tiles
-
Scyon Sheeting
-
Besser Blocks
-
Stainless Steel Flashings


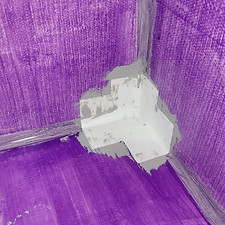
FORMING SHEETS - STEP BY STEP

CUT
Cut PDQ Poly sheet with scissors/Stanley knife, ensure extra sheet material is left to allow overlap.

HEAT
Using a heat gun, heat the PDQ Poly sheet.

FORM
Form PDQ Poly sheet by pressing down into the puddle flange.

SEAL
Use SMX-50 sealant to seal PDQ Poly sheet membrane to the inside of the puddle flange.
Section Title
This is a Paragraph. Click on "Edit Text" or double click on the text box to start editing the content and make sure to add any relevant details or information that you want to share with your visitors.
List Title
This is a Paragraph. Click on "Edit Text" or double click on the text box to start editing the content and make sure to add any relevant details or information that you want to share with your visitors.
List Title
This is a Paragraph. Click on "Edit Text" or double click on the text box to start editing the content and make sure to add any relevant details or information that you want to share with your visitors.
List Title
This is a Paragraph. Click on "Edit Text" or double click on the text box to start editing the content and make sure to add any relevant details or information that you want to share with your visitors.
List Title
This is a Paragraph. Click on "Edit Text" or double click on the text box to start editing the content and make sure to add any relevant details or information that you want to share with your visitors.